
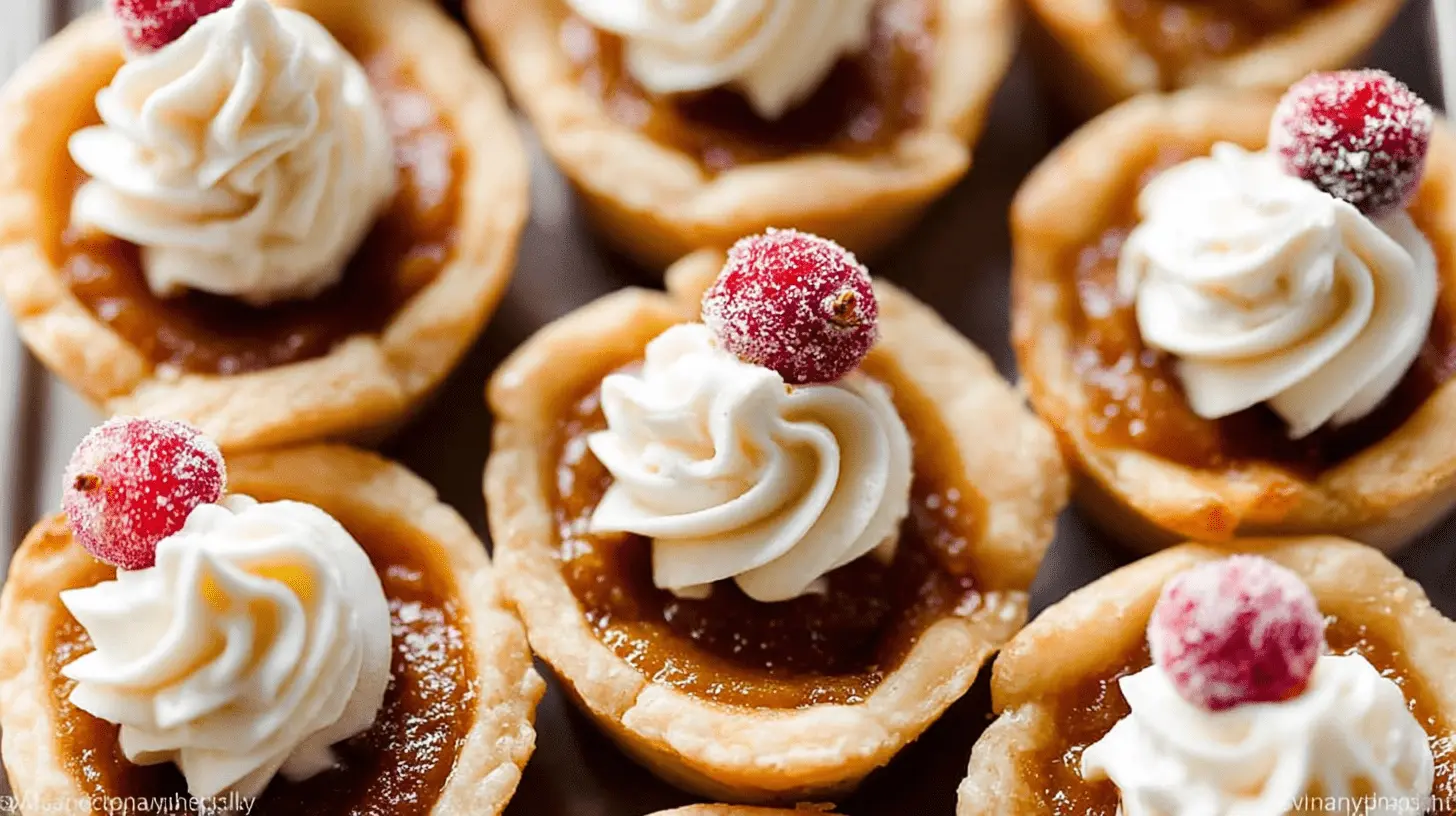
Fall is here, and what better way to celebrate than with these charming mini pumpkin pies? They’re incredibly easy to make and bring a festive touch to any table. Featuring a flaky homemade (or store-bought) crust and a rich, warmly spiced pumpkin filling, these pies are a delightful individual dessert. Perfect for holiday gatherings, potlucks, or simply a cozy autumn evening, they are sure to be a crowd-pleaser.
Why You’ll Love These Mini Pumpkin Pies
These delightful mini pumpkin pies are an absolute joy to bake and even better to eat. Sweet Emily is all about making baking simple for busy parents and beginners, and this recipe delivers!
- Effortlessly Easy: They are simple and fun to prepare, making them a fantastic activity to do with kids.
- No Blind Baking: Forget the extra step of blind baking! Our recipe skips this, saving you time and effort.
- Quick Bake & Cool: Enjoy a significantly shorter baking and cooling time compared to a full-sized pie.
- Irresistible Flavor: Savor a deeply spiced, brown sugar-sweetened filling that tastes like autumn.
- Perfectly Portioned: Each convenient, handheld, single-serving treat is ideal for individual enjoyment.
- Entertaining Made Easy: They make a beautiful and practical addition to any dessert table or holiday spread.
Ingredients
Get ready to gather a few simple ingredients for your delicious mini pumpkin pies. High-quality components make all the difference in flavor and texture.
- Pie Crust: Two unbaked discs, either your favorite homemade recipe or a good quality store-bought brand.
- Pumpkin Puree: One and a quarter cups (285g) of canned pumpkin puree. Ensure it’s 100% pumpkin, not pumpkin pie filling. For food safety, it’s important to understand the USDA guidelines on safely preserving pumpkin puree when preparing it at home.
- Brown Sugar: Three-quarters of a cup (150g) of packed light or dark brown sugar for deep sweetness.
- Heavy Cream: One-half cup (120ml) of full-fat heavy cream adds luxurious richness to the filling.
- Whole Milk: One-quarter cup (60ml) of whole milk contributes to the creamy, smooth texture.
- Large Egg: One large egg acts as a binder, helping the filling set beautifully.
- Salt: One-quarter teaspoon of salt balances the sweetness and enhances all the flavors.
- Ground Cinnamon: One teaspoon of ground cinnamon for a classic warm spice note.
- Pumpkin Pie Spice: One teaspoon of store-bought or homemade pumpkin pie spice blend.
- Black Pepper: A small pinch of black pepper (optional) surprisingly adds depth and complexity to the spice profile. As Tasting Table explains, black pepper can deepen the overall flavors in pumpkin pie.
Notes & Substitutions
- Pie Crust: Feel free to use your favorite flaky pie dough. An all-butter crust adds amazing flavor.
- Pumpkin: Canned pumpkin is best for consistency. If using fresh pumpkin puree, blot it with a paper towel to remove excess moisture.
- Dairy: You can substitute half-and-half for the heavy cream and whole milk combination if preferred.
- Spices: Customize your pumpkin pie spice blend to your liking, adding extra nutmeg or cloves if desired.
- Black Pepper: Don’t skip this secret ingredient! It subtly enhances the other spices without making the pies taste peppery.
Equipment
Having the right tools makes baking these mini pumpkin pies even smoother. Gather these essential items before you begin.
- Mini muffin pans (two 24-count pans are ideal for baking a full batch efficiently).
- 2.5-inch round cookie cutter or a measuring cup of similar diameter for shaping the crusts.
- Large mixing bowl for preparing the smooth pumpkin filling.
- Whisk or an electric mixer (handheld or stand mixer) for effortless mixing.
- Rolling pin for evenly rolling out your pie dough.
- Nonstick cooking spray to ensure your mini pies release easily from the pans.
Instructions
Making these delightful mini pumpkin pies is a straightforward and rewarding process. Follow these steps for perfect results every time.
- Prepare Pie Dough: Start by making your pie dough ahead of time. It needs to chill in the refrigerator for at least 2 hours, or preferably overnight, before you use it. This chilling step is crucial for flaky crusts.
- Mix Filling: In a large bowl, whisk together the pumpkin puree, brown sugar, heavy cream, milk, egg, salt, ground cinnamon, pumpkin pie spice, and the optional black pepper. If using an electric mixer, beat on medium-high speed for about 2 minutes until the mixture is completely smooth and well combined. You’ll have approximately 3 cups of filling. Cover the bowl and refrigerate the filling until step 6.
- Preheat Oven & Prep Pans: Preheat your oven to 375°F (191°C). Generously grease two 24-count mini muffin pans with nonstick cooking spray. If you only have one pan, you will bake these in batches.
- Cut Crust Rounds: On a lightly floured surface, unroll one chilled pie dough disc. Roll it into a large 12-inch circle. If the edges crack, gently mold them back together with your warm hands. Use a 2.5-inch round cookie cutter (or a 1/3 cup measuring cup) to cut circles from the dough. You will need to re-roll dough scraps a few times to maximize your yield. Work quickly, as the dough becomes more delicate at room temperature. Each pie crust disc should yield about 24 rounds, totaling around 48 rounds for both discs.
- Form Crusts: Carefully place each dough round into the greased crevices of the mini muffin pan(s). Gently press the dough flat into the bottom and up the sides of each cup to form a neat crust.
- Fill Crusts: Retrieve the chilled pumpkin filling. Evenly spoon the cold filling into each unbaked crust, filling them almost to the very top. The cold filling helps prevent the crust from becoming soggy during baking.
- Bake Pies: Bake the mini pies for approximately 21–25 minutes. They are done when the centers are just about set (they might still have a slight jiggle) and the edges of the crusts are lightly browned and crisp.
- Cool & Serve: Allow the baked mini pumpkin pies to cool in the muffin pan for 5 minutes. If properly greased, they should pop right out with a gentle scoop from a spoon. Transfer them to a wire rack to cool completely. The filling will deflate a bit as they cool. Serve at room temperature or refrigerate until chilled and serve cold. Top with fresh whipped cream or sugared cranberries if desired.
Pro Tips for Perfect Mini Pumpkin Pies
Mastering these delightful mini pumpkin pies is easy with a few key tricks. These tips ensure your pies are perfectly baked and delicious every time.
- Chill Dough and Filling: Always ensure both your pie dough and the pumpkin filling are thoroughly chilled before assembly. This prevents soggy crusts and helps the filling set correctly.
- Work Quickly with Dough: Pie dough is happiest when cold. Handle it quickly and efficiently to prevent it from becoming warm and sticky.
- Don’t Overfill: Fill the mini crusts almost to the top, but avoid overfilling. Overfilling can cause spillage and uneven baking.
- Check for Doneness: Look for lightly browned, set edges on the crust. The center of the filling should be mostly firm, with a slight wobble, indicating it’s perfectly cooked.
- Cool Completely: Allow the pies to cool fully on a wire rack. This is crucial for the filling to properly set and for the flavors to fully develop.
Serving, Storage & Variations
These charming mini pumpkin pies are versatile for any occasion. Here’s how to best enjoy, store, and even customize them.
- Serving Suggestions: Elevate your mini pies with a dollop of homemade whipped cream, a sprinkle of ground cinnamon, or a festive garnish of sugared cranberries.
- Storage: Cover any leftover mini pumpkin pies tightly and store them in the refrigerator for up to 5 days. They taste wonderful chilled.
- Freezing: For longer storage, freeze baked mini pies in an airtight container for up to 3 months. Thaw them in the refrigerator overnight before serving.
- Standard Muffin Pan: If you only have a regular muffin pan, use a larger cookie cutter (around 3-3.5 inches) for the crusts and adjust the baking time slightly longer, checking for doneness.
- Crust Variations: Experiment with different crusts! An all-butter crust offers unparalleled flakiness, or try a crushed gingersnap cookie crust for an extra layer of spice and crunch.
- Spiced Whipped Cream: Infuse your homemade whipped cream with a pinch of cinnamon, ginger, or even a touch of maple syrup for an extra special topping.
Nutrition
Enjoying homemade mini pumpkin pies means you have control over the ingredients. While this is a dessert item, knowing the estimated values can be helpful for dietary planning. Please note these are approximate values per serving and can vary based on specific ingredient brands and portion sizes.
| Nutrient | Amount (estimated per pie) |
|---|---|
| Calories | 180-220 kcal |
| Total Fat | 9-12g |
| Saturated Fat | 5-7g |
| Cholesterol | 30-40mg |
| Sodium | 100-130mg |
| Total Carbs | 20-25g |
| Sugars | 12-15g |
| Protein | 2-3g |
FAQ
Got questions about making your delightful mini pumpkin pies? Here are some quick answers to common queries.
- Can I make the filling ahead of time? Absolutely! You can prepare the pumpkin filling up to 2-3 days in advance. Just cover it tightly and store it in the refrigerator until ready to use.
- Can I freeze the unbaked filling? Freezing the unbaked filling isn’t recommended as it can affect the texture of the pumpkin puree and the egg’s binding properties after thawing. It’s best to prepare it fresh or freeze the baked pies.
- My pies are runny in the center, what went wrong? This usually means they were underbaked. Bake them for a few more minutes until the center is just set, with only a slight jiggle. Oven temperatures can vary, so adjust accordingly.
- Can I make these gluten-free? Yes, easily! Simply substitute your favorite gluten-free pie crust for a delicious gluten-free version of these mini pumpkin pies. The filling itself is naturally gluten-free.
- Can I use a regular muffin tin instead of mini? You can! You will need to use a larger cookie cutter for the crusts and adjust baking time. They will also yield fewer, larger pies.
- How do I easily get the pies out of the pan? Ensure your muffin pans are very well greased. After a 5-minute cool-down, gently run a thin knife or offset spatula around the edges, then use a spoon to lift them out.
Conclusion
These mini pumpkin pies are more than just a dessert; they are a charming embodiment of autumn’s warmth and comfort. Their simplicity makes them incredibly approachable for beginners, while their delightful flavor ensures they are a hit with everyone. Whether you’re hosting a grand holiday feast or enjoying a quiet evening at home, these perfectly portioned treats are always a welcome addition. Embrace the joy of fall baking with this easy, crowd-pleasing recipe, and watch as these adorable mini pumpkin pies become a new favorite in your home.
Delicious Mini Pumpkin Pies: Your Ultimate Fall Treat

Whip up these adorable and delicious mini pumpkin pies, perfect for any fall gathering. Featuring a rich, spiced pumpkin filling baked in flaky crusts, these bite-sized treats are an ultimate crowd-pleaser.
- large bowl
- handheld or stand mixer
- whisk attachment
- whisk
- 24-count mini muffin pans
- nonstick spray
- 2.5 inch cookie cutter
- 1/3 cup measuring cup
- spoon
Main Ingredients
- 2 discs Pie Crust ((what I used) or All Butter Pie Crust)
- 1 and 1/4 cups pumpkin puree ((285g))
- 3/4 cup brown sugar ((150g) packed light or dark)
- 1/2 cup heavy cream ((120ml))
- 1/4 cup whole milk ((60ml))
- 1 large egg
- 1/4 teaspoon salt
- 1 teaspoon ground cinnamon
- 1 teaspoon pumpkin pie spice (store-bought or homemade)
- small pinch black pepper ((optional—see note))
Preparation
- Ensure your pie dough is prepared and chilled for at least 2 hours before you start making the mini pies.
- In a large bowl, whisk together the pumpkin puree, brown sugar, heavy cream, milk, egg, salt, cinnamon, pumpkin pie spice, and black pepper for about 2 minutes until completely combined; then cover and refrigerate the filling.
- Preheat your oven to 375°F (191°C) and generously grease two 24-count mini muffin pans with nonstick spray.
- Working with one chilled pie dough at a time, roll it into a 12-inch circle on a floured surface, then cut approximately 24 rounds using a 2.5-inch cookie cutter; re-roll dough scraps as needed and repeat with the second dough for a total of about 48 rounds.
- Place each dough round into the greased mini muffin pans, pressing it flat into the bottom and up the sides of each crevice.
- Evenly spoon the cold pumpkin filling into each unbaked crust, filling them completely to the top.
Baking & Serving
- Bake the mini pies for 21-25 minutes, or until the center is just set and the edges are lightly browned. Allow them to cool for 5 minutes before carefully removing them from the pan with a spoon; serve at room temperature or chilled, optionally topped with whipped cream.
Storage
- Cover any leftover mini pies tightly and store them in the refrigerator for up to 5 days.
For best results, prepare pie dough the night before to allow adequate chilling time. A small pinch of black pepper is optional but can enhance the flavor. Serve these delightful mini pies at room temperature or chilled, and consider topping with whipped cream or sugared cranberries for an extra special touch. The filling may deflate slightly as the pies cool.