
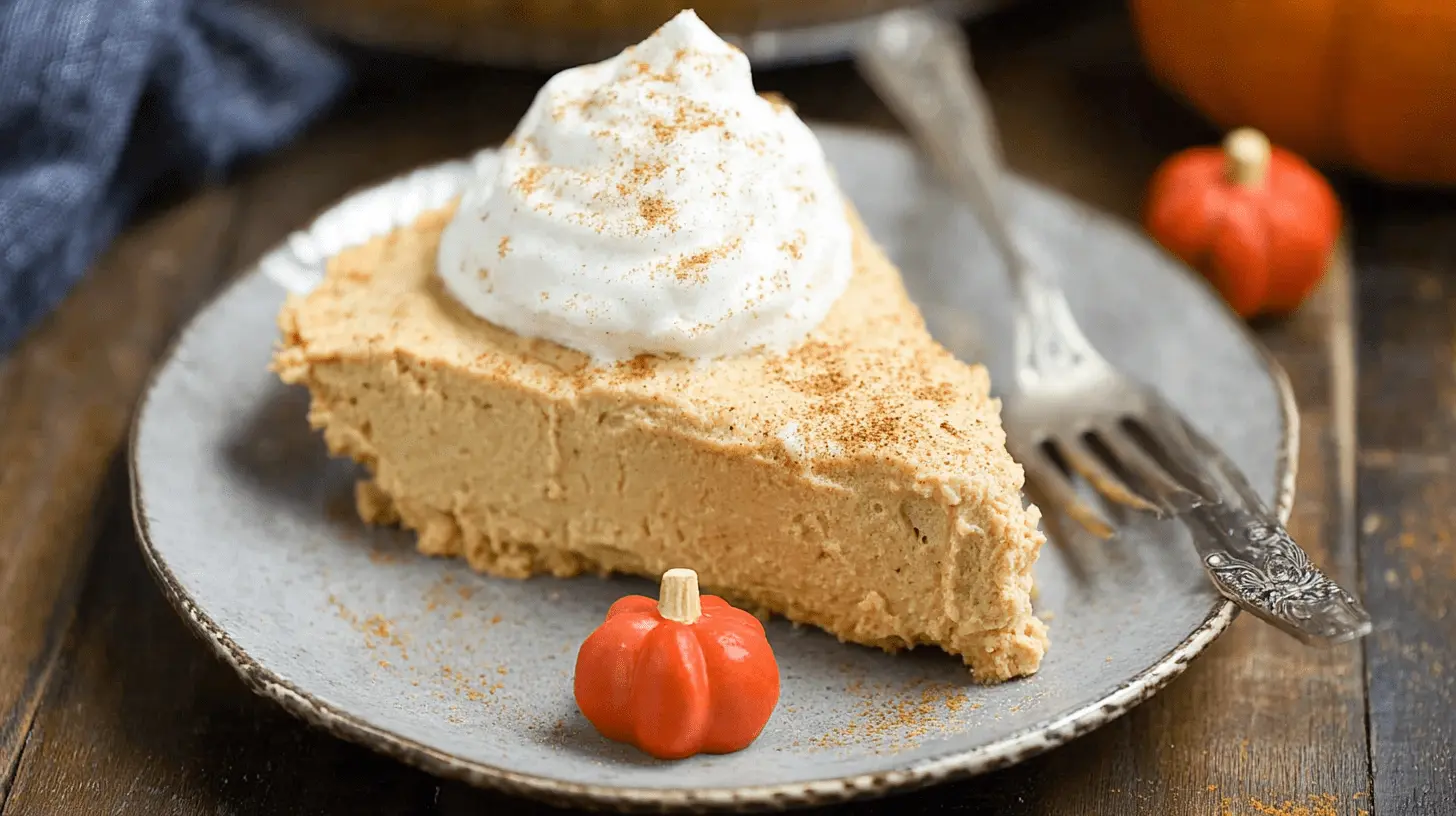
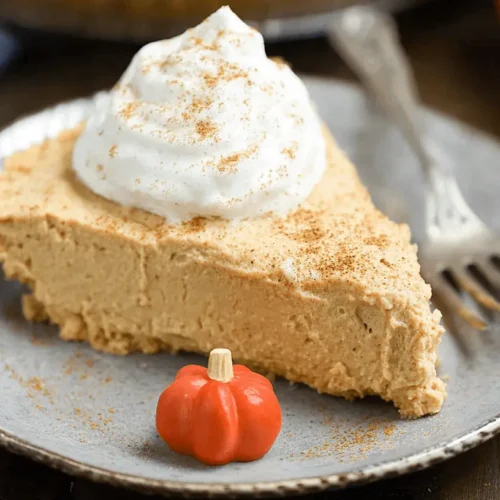
Sweet Emily is here to make baking simple, and this no bake pumpkin pie recipe is a perfect example! Forget the oven and complicated steps. This effortless dessert comes together quickly, ideal for busy holidays or any time you crave a taste of fall. Get ready for a wonderfully creamy texture and classic pumpkin spice flavor without any fuss.
Why You’ll Love This No Bake Pumpkin Pie
This simple no bake pumpkin pie offers so many reasons to become your new favorite fall treat.
- It’s incredibly easy and quick to prepare, freeing up your time.
- No oven is needed, making it perfect for crowded holiday kitchens or hot days.
- You get a wonderfully creamy and smooth pumpkin filling every time.
- It delivers all the delicious, classic fall flavors everyone loves.
- You only need simple, readily available pantry ingredients.
- This recipe is beginner-friendly, guiding you every step of the way.
Ingredients
Making a delightful no bake pumpkin pie requires just a few pantry staples. Each ingredient plays a crucial role in creating that perfect creamy texture and classic fall flavor profile.
- 1 cup (249g) pumpkin puree: Use 100% pure pumpkin, not pumpkin pie filling.
- 1 (3.4 ounce) box instant vanilla pudding mix: Ensure it’s instant, not “cook and serve.”
- ¼ cup (59ml) cold milk: Dairy or non-dairy milk works equally well.
- 2 teaspoons pumpkin pie spice: Adjust to your taste preference.
- 8 ounces frozen whipped topping (Cool Whip): Thawed before use.
- 1 (9-inch) graham cracker crust: Store-bought or a quick homemade version.
- Extra whipped cream: For serving, if desired.
Notes & Substitutions
- Pumpkin Puree: Always use 100% pure pumpkin puree. As Martha Stewart explains, pumpkin pie filling includes added sweeteners and spices, which will alter the taste and consistency of your no bake pumpkin pie.
- Pudding Mix: Instant vanilla pudding is crucial for the pie to set properly. Other flavors like cheesecake or butterscotch can work, but vanilla provides the best neutral base for the pumpkin flavor.
- Milk: Any type of milk (whole, skim, almond, oat) works well with the instant pudding mix. Use cold milk for the best setting results.
- Pumpkin Pie Spice: If you don’t have a pre-mixed blend, you can easily make your own. Combine 1 teaspoon ground cinnamon, ¼ teaspoon ground nutmeg, ¼ teaspoon ground ginger, and a pinch of ground cloves.
- Cool Whip: For a homemade alternative, use stabilized whipped cream. Just be sure it’s stiff enough to hold its shape.
- Crust: A store-bought graham cracker crust is a fantastic time-saver. You can also make a quick homemade graham cracker crust with crushed graham crackers, melted butter, and a touch of sugar.
- Crust Alternatives: Feel free to experiment! An Oreo crust, Nilla wafer crust, or even a shortbread crust can add a delightful twist to this creamy pumpkin dessert.
Equipment
Gathering your tools before you start makes the process even smoother. For this easy no bake pumpkin pie, you’ll need just a few basic kitchen items.
- Large mixing bowl
- Whisk or electric mixer
- Rubber spatula
- Measuring cups and spoons
- 9-inch pie plate
Instructions
Creating this delightful no bake pumpkin pie is incredibly simple. Just follow these easy, step-by-step instructions. You’ll be enjoying a delicious dessert in no time!
- Combine Dry Ingredients with Wet: In your large mixing bowl, add the 1 cup of pumpkin puree, the 3.4-ounce box of instant vanilla pudding mix, and the 2 teaspoons of pumpkin pie spice.
- Add Milk and Whisk: Pour in the ¼ cup of cold milk. Using a whisk or an electric mixer on low speed, stir all these ingredients together. Whisk until the mixture is smooth, thoroughly combined, and starts to thicken slightly, ensuring no lumps remain from the pudding mix. This should only take about 1-2 minutes.
- Gently Fold in Whipped Topping: Carefully take your thawed 8 ounces of Cool Whip. Using a rubber spatula, gently fold the whipped topping into the pumpkin mixture. Use a gentle motion to incorporate it fully without deflating the airy texture of the Cool Whip. Continue folding until the mixture is uniform in color and texture.
- Fill the Pie Crust: Spoon the creamy pumpkin filling into your prepared 9-inch graham cracker crust. Use your spatula to spread the mixture evenly across the crust, creating a smooth top.
- Chill Thoroughly: This is the most important step for a perfectly set no bake pumpkin pie. Place the filled pie in the refrigerator. Chill it for at least 3 hours, but 4 hours or even overnight is ideal for the best firm texture. This allows the pudding to fully set and the flavors to meld beautifully.
- Slice and Serve: Once thoroughly chilled, remove your pie from the refrigerator. Slice it into wedges using a sharp knife. Serve each slice of this delicious pumpkin dessert with an extra dollop of whipped cream on top, if desired, for an extra touch of indulgence. Enjoy your easy, oven-free treat!
Pro Tips & Troubleshooting
Achieving the perfect slice of no bake pumpkin pie is easy with these helpful tips. Keep these in mind to ensure a smooth, delightful dessert every time.
- Pudding Type: Always double-check you are using instant pudding mix, not the “cook and serve” variety. The instant type contains ingredients that allow it to set without heat.
- Cold Milk: Use very cold milk when mixing with the instant pudding. This helps activate the setting agents more effectively, resulting in a firmer pie.
- Folding Cool Whip: Be gentle when folding in the thawed whipped topping. Overmixing can deflate it, leading to a less airy and potentially thinner filling.
- Chill Time: The secret to a perfectly set no bake pumpkin pie lies in proper chilling. Ensure the pie chills for the full recommended time, at least 3-4 hours, or even overnight for the best results.
- Cover Pie: Cover your pie tightly with plastic wrap while chilling to prevent it from absorbing refrigerator odors and to keep the top from drying out.
- Adjust Spice: Taste your pumpkin mixture before adding it to the crust and adjust the pumpkin pie spice to your preference. Some like a bolder spice, others prefer it milder.
- Runny Pie: If your pie is runny, it’s likely due to insufficient chilling time or using the wrong type of pudding mix (cook-and-serve). Give it more time in the fridge.
- Soggy Crust: To prevent a soggy graham cracker crust, brush a thin layer of melted white chocolate or dark chocolate onto the bottom of the crust before adding the filling. Let it set in the fridge for a few minutes.
Serving, Storage & Variations
Your creamy no bake pumpkin pie is a versatile dessert that’s easy to serve, store, and customize. Enjoy it fresh, save it for later, or get creative with delicious variations.
- Serving: Serve this delightful pumpkin dessert straight from the refrigerator, well-chilled. A generous dollop of extra whipped cream on top is the perfect finishing touch. You can also sprinkle a little extra pumpkin pie spice or cinnamon over the whipped cream for added flair.
- Storage: Store any leftover pie slices covered tightly with plastic wrap or in an airtight container in the refrigerator. It will stay fresh and delicious for up to 4 days.
- Freezing: For longer storage, slices of this pie freeze beautifully. Place individual slices on a baking sheet to freeze until firm (about 1-2 hours), then transfer them to an airtight, freezer-safe container or wrap them individually in plastic wrap and then foil. Freeze for up to 1 month.
- Thawing: When you’re ready to enjoy a frozen slice, simply thaw it overnight in the refrigerator. It will be just as delicious as when it was first made.
Variations
- Crust: Explore different crust options beyond graham cracker. A crushed chocolate cookie (Oreo) crust, gingersnap crust, or even a shortbread crust can add a unique flavor twist to this easy pumpkin pie.
- Spice Level: Elevate the classic pumpkin pie spice by adding a pinch of extra cinnamon, a dash of nutmeg, or a hint of ground ginger directly into the pumpkin mixture for a bolder taste.
- Toppings: Get creative with toppings! Drizzle with warm caramel sauce, sprinkle with chopped pecans or candied walnuts, or add a dusting of cocoa powder for an elegant touch.
- Flavor Boost: For an extra layer of autumn flavor, add a tablespoon of pure maple syrup or a splash of vanilla extract to the pumpkin filling.
- Individual Servings: Transform this classic recipe into mini desserts! Use individual mini graham cracker crusts or layer the filling in small serving cups or ramekins for adorable single-serving treats.
Nutrition
This section provides estimated nutritional information for one serving of the no bake pumpkin pie. These values are calculated based on the ingredients listed and are for informational purposes only.
| Serving Size | 1 slice |
|---|---|
| Calories | 224 kcal |
| Carbohydrates | 38 g |
| Protein | 2 g |
| Fat | 7 g |
| Saturated Fat | 2 g |
| Cholesterol | 5 mg |
| Sodium | 224 mg |
| Potassium | 127 mg |
| Fiber | 1 g |
| Sugar | 22 g |
| Vitamin A | 4830 IU |
| Vitamin C | 1.4 mg |
| Calcium | 57 mg |
| Iron | 1.1 mg |
Please remember that exact nutritional values can vary depending on specific brands and ingredient choices. If you have dietary concerns, always consult with a qualified health professional or registered dietitian.
FAQ
Got questions about making your easy no bake pumpkin pie? We have answers to help you succeed!
- Can I use pumpkin pie filling instead of pumpkin puree? No, always use 100% pure pumpkin puree. Pumpkin pie filling is pre-sweetened and spiced, which will alter the flavor and consistency of this recipe.
- Can I make this dairy-free? Yes, absolutely! Simply use your preferred non-dairy milk (like almond or oat milk) and a non-dairy frozen whipped topping.
- How long does this no bake pumpkin pie need to chill? It needs to chill for a minimum of 3-4 hours to properly set. For the best, firmest slices, chilling it overnight is highly recommended.
- Can I freeze no-bake pumpkin pie? Yes, you can! Wrap individual slices well and freeze for up to 1 month. Thaw them overnight in the refrigerator before serving.
- Why is my pie runny? A runny pie usually means it didn’t chill long enough, or you might have accidentally used “cook and serve” pudding instead of “instant” pudding. Ensure you use cold milk and plenty of chill time.
- Can I make my own graham cracker crust? Yes, definitely! A homemade graham cracker crust is simple to make with crushed graham crackers, melted butter, and a bit of sugar, then pressed into your pie plate.
Conclusion
This easy no bake pumpkin pie truly delivers on its promise of simplicity and sensational flavor. It’s the perfect fuss-free dessert for fall gatherings, holidays, or any time you crave a comforting, creamy pumpkin treat. With no oven required and minimal effort, even beginner bakers can achieve a show-stopping result. We hope you love how effortless and delicious this recipe is. Try this no bake pumpkin pie recipe today, share your creations, and let us know what you think!
Easy No Bake Pumpkin Pie
Equipment
- Large bowl
- Spatula
- Pie plate
Ingredients
Pie Filling
- 1 cup pumpkin puree (249g)
- 1 box instant vanilla pudding 3.4 ounce
- 1/4 cup milk (59ml)
- 2 teaspoons pumpkin pie spice
- 8 ounces Cool Whip
- 1 (9-inch) graham cracker crust store-bought or homemade
For Serving
- Whipped Cream for serving
Instructions
Preparation
- In a large bowl, stir together the pumpkin puree, instant vanilla pudding mix, milk, and pumpkin pie spice until completely smooth with no lumps.
- Carefully fold the Cool Whip into the pumpkin mixture until it is fully combined.
- Spread the pumpkin mixture evenly into the prepared graham cracker crust. Chill the pie in the refrigerator for at least 3 hours, or until it is set enough to slice. Serve chilled with extra whipped cream.