
knafeh has this funny way of sneaking into your cravings right when you want something warm, sweet, and a little over the top. Ever had one of those evenings when you want dessert that actually feels like a hug? That was me last week, rummaging through my pantry, thinking about that crunchy top, gooey cheese pull, and floral syrup that makes the whole kitchen smell like a bakery. I made a pan, took one bite, and instantly remembered why this dessert has fans across continents. If you love desserts that are both cozy and dramatic, keep reading. I’ve got the background, the variations, the pan talk, and a super approachable way to make it at home. 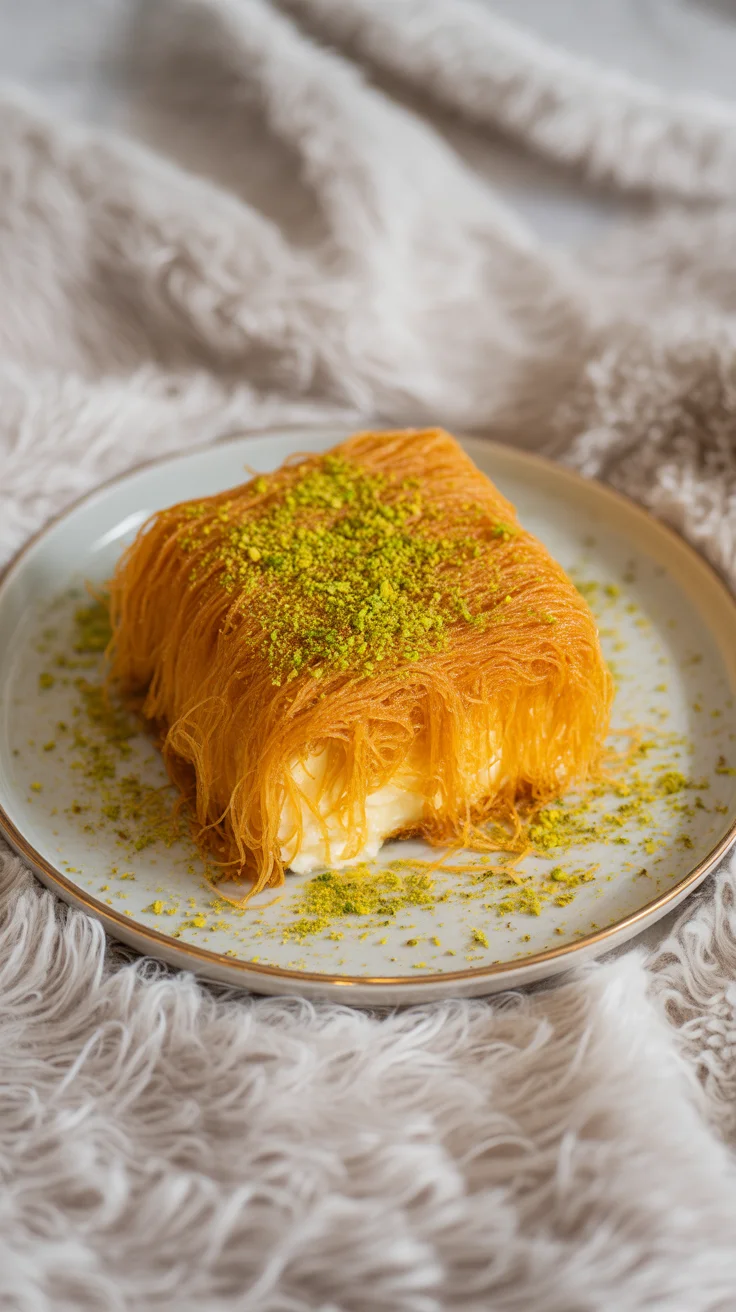
Etymology
Words tell stories, and the name of this dessert carries a bit of that charm. Many food historians trace the word to Arabic roots linked with comfort and shelter. You’ll see it spelled in different ways across regions and transliterations, but the heart of it stays the same. That comforting vibe shows up in how people describe the first bite too. Crispy, creamy, syrupy, and warming.
There are debates around where the word first came from, yet they all land on the same idea: a dessert that feels cared for and carefully handled. When you think about the technique and textures, it makes sense. You take buttered pastry shreds or semolina, cradle soft cheese, and finish it with a fragrant syrup that ties everything together. If you’ve never tried knafeh, it’s one of those desserts that says a lot with very few ingredients.
I also love how the name has become shorthand among friends. Someone says knafeh and everybody lights up. You can almost hear the crunch in the conversation.
Quick takeaway: the name hints at comfort, and the dessert delivers it.
History
This dessert has a long, winding story that echoes through Levantine kitchens, bustling city bakeries, and family celebrations. Versions of it have been made for generations in places like Nablus, Jerusalem, Beirut, and beyond. Some say it became especially famous in certain cities where local cheese traditions shaped the style. Others point to traveling cooks and merchants who spread the technique along trade routes.
Whatever path it took, the dessert became a beloved staple at gatherings. It feels celebratory without being fussy. People pass plates, sprinkle pistachios, and share napkins, smiles, and seconds. I tasted a version on a street corner that honestly spoiled me. The syrup was just right, not too sweet, with a whisper of orange blossom. The cheese had that gentle stretch, not rubbery, not soggy. It was perfection in a paper plate moment.
Want to explore more sweets from the region and their backstories? Take a peek at my guide to Middle Eastern desserts for context and more tasty rabbit holes.
“I thought making it at home would be complicated, but your method actually works. Crunchy top, creamy middle, and the syrup perfumed the whole apartment. My family crushed the entire pan in 15 minutes.”
Common variants
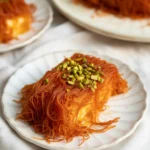
There are two big personalities in this dessert universe. One uses shredded pastry that looks like thin noodles. This version bakes up light and shatteringly crisp. The other uses a fine semolina base that turns delicate and cake-like. Both are lovely and both have die-hard fans. Here are the big differences and fun tweaks to try.
Cheese and topping combos
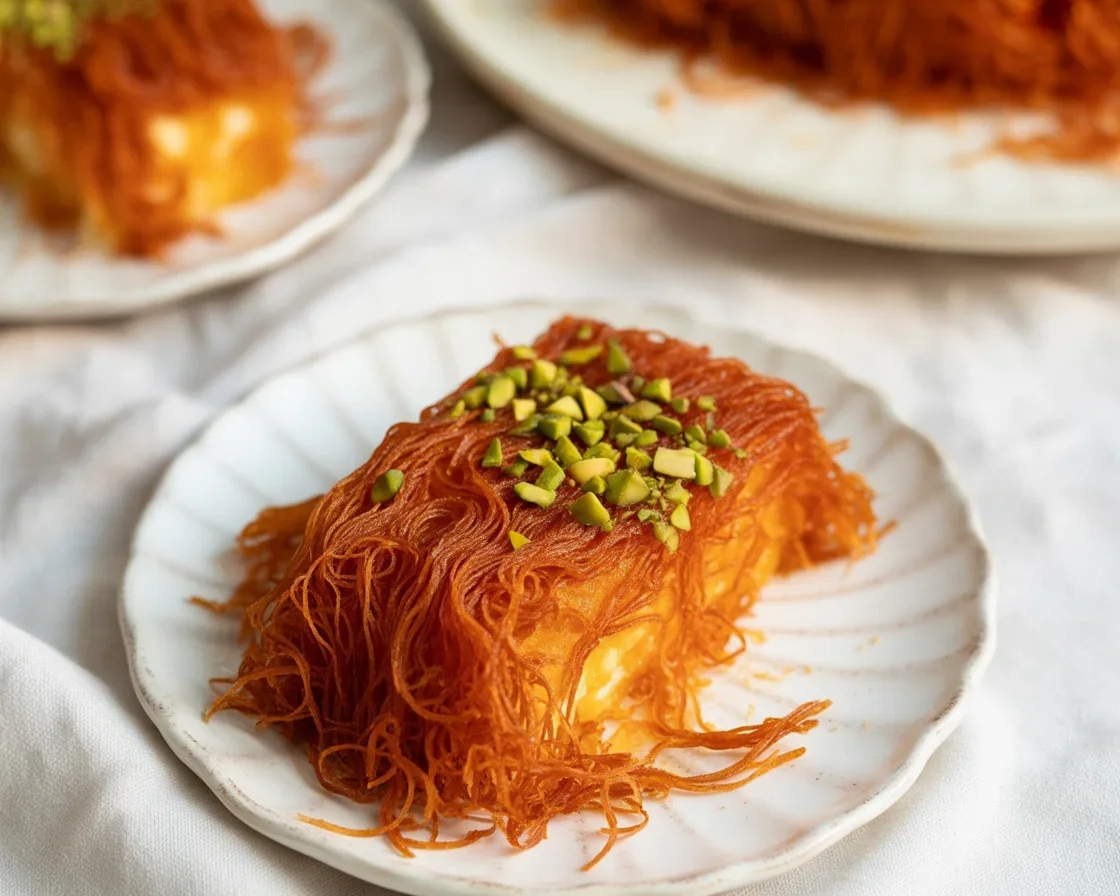
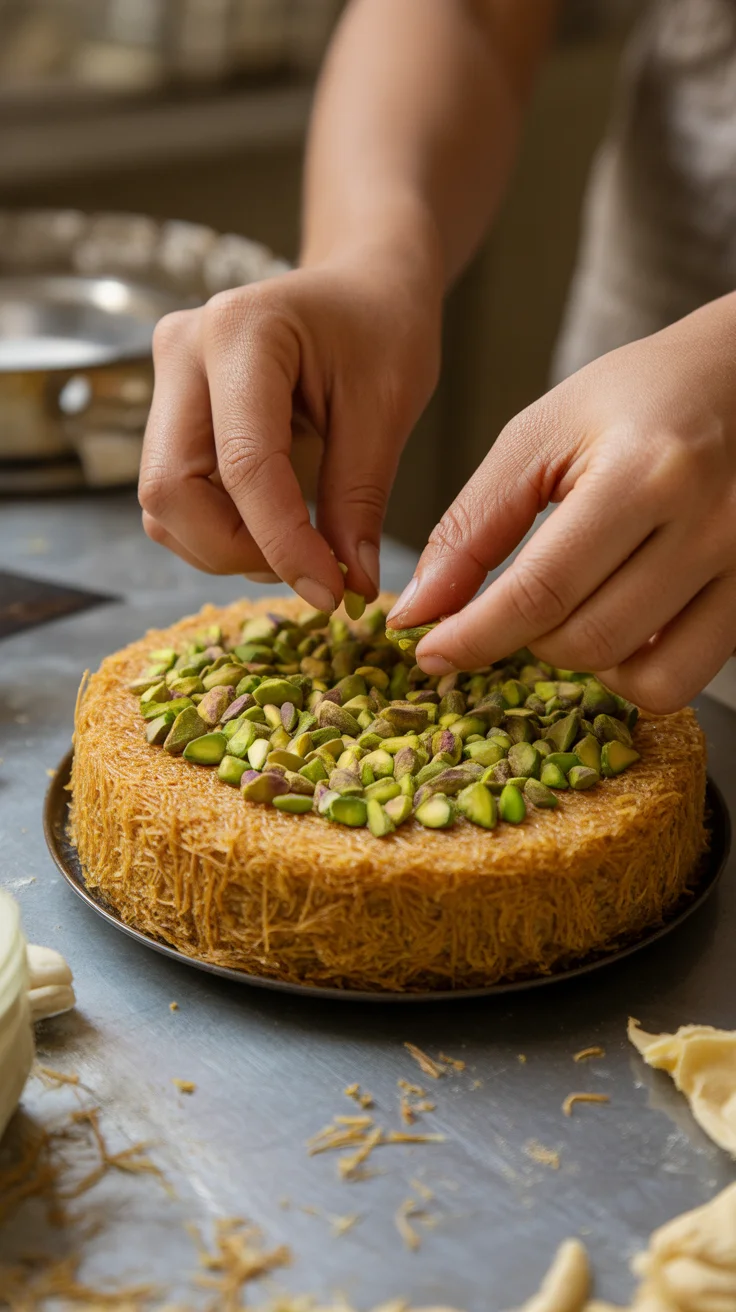
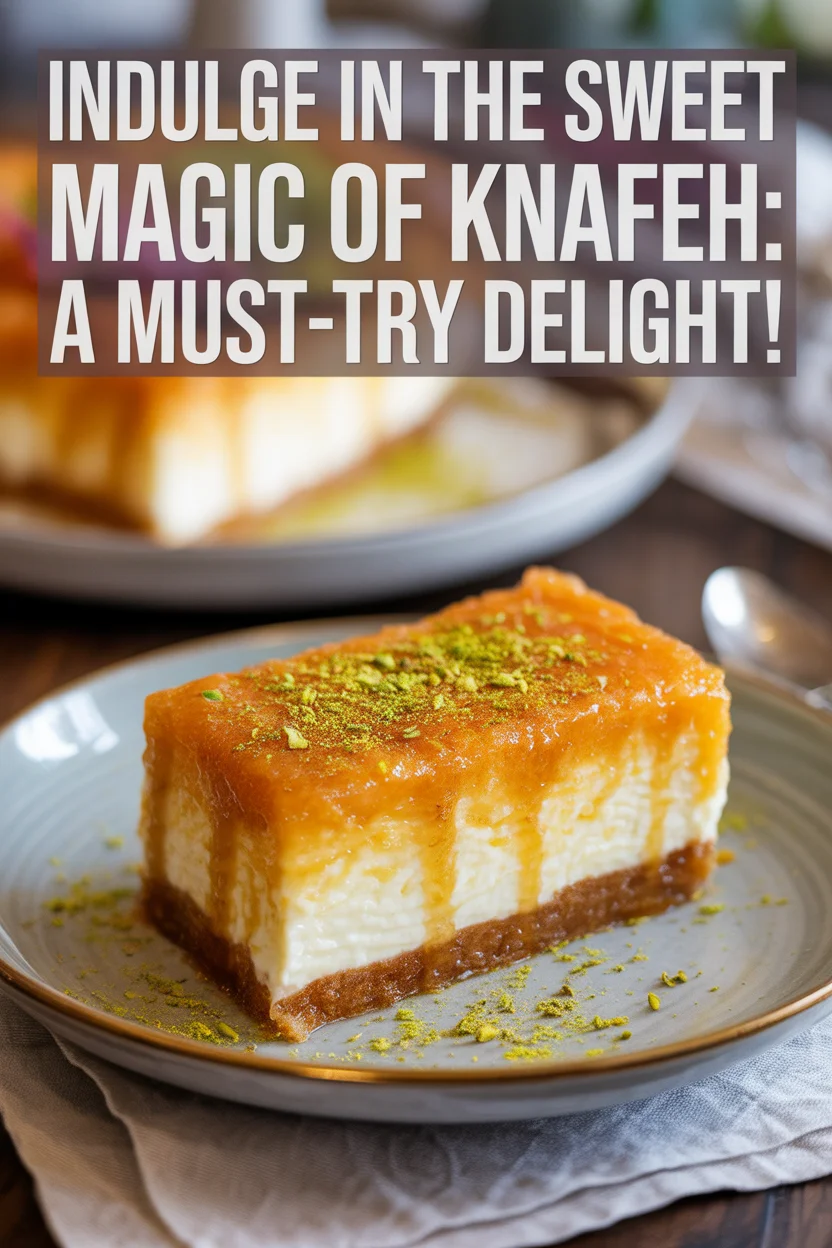
Cheese is the soul here. Traditional options often lean mild and slightly salty. In a pinch, a combo of low-moisture mozzarella with a little ricotta works surprisingly well. Rinse and soak saltier cheeses if needed to mellow them out. As for toppings, pistachios are classic. Almonds are great too. A little rose or orange blossom water in the syrup takes the whole thing to another level.
Color can vary as well. Some versions have a golden or softly tinted top thanks to butter and careful baking. The important part is that gentle crunch when your spoon first breaks through. That contrast with the creamy cheese is what makes knafeh so addictive.
Curious about the sugar syrup details and how to nail the texture you love? I keep a handy resource here: sugar syrup guide.
How to make Knafeh
This is my weeknight-friendly method. It’s flexible, doesn’t need a specialty store run, and still feels special. A few small details make a big difference, so I’ll flag the important ones in bold.
Ingredients
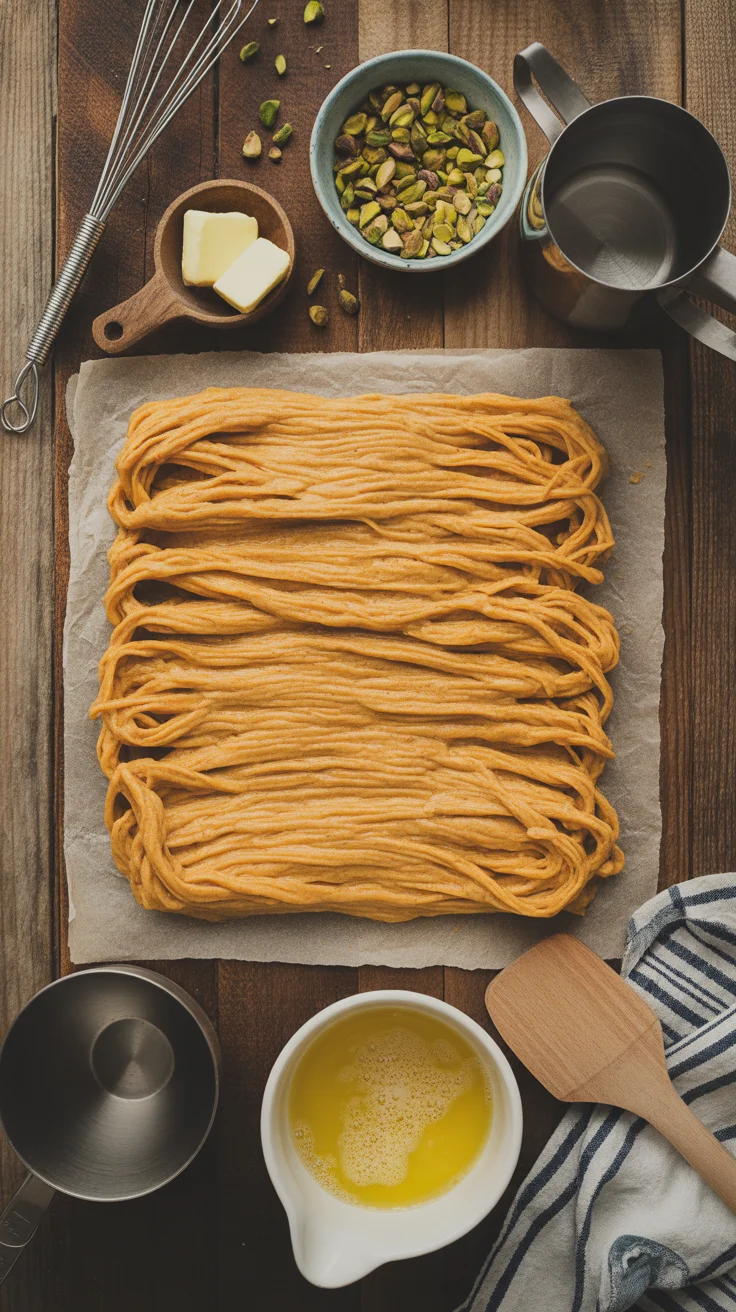
- Shredded pastry or fine semolina, depending on the style you choose
- Unsalted butter, melted
- Mild cheese: low-moisture mozzarella plus a few spoonfuls of ricotta or cream for richness
- Granulated sugar
- Water
- Lemon juice
- Orange blossom water or rose water, optional but lovely
- Pistachios, finely chopped, for sprinkling
Directions
- Prep the syrup first. Simmer sugar and water until it looks clear and slightly thickens. Turn off the heat, add a little lemon juice, and a few drops of orange blossom or rose water. Let it cool. Cool syrup on hot pastry is the secret for a crisp top.
- For the pastry version, toss the shredded pastry with melted butter until every strand is glossy. Press half into your buttered pan. Layer cheese in the center, then top with the remaining pastry. For the semolina version, mix semolina with melted butter, press half into the pan, add cheese, then the rest of the semolina.
- Bake at a moderate temperature until deeply golden. Don’t rush the color. The fragrance will tell you when it’s close, and the edges will look set and crisp.
- Drizzle cooled syrup over the hot pan. You’ll hear a gentle sizzle. That’s the happy sound. Not all the syrup at once. Pour, wait, taste, then add more if needed. Aim for balanced sweetness.
- Top with pistachios, rest for a few minutes, then slice. Cheese should be soft and stretchy, not runny.
Syrup and texture tips
Tip 1: Use just enough syrup. Too much will make it soggy, too little and it can taste dry. Start small and adjust.
Tip 2: If your cheese is salty, soak it in cold water, then pat dry. Gentle is key here.
Tip 3: Let the pan sit for 3 to 5 minutes after syruping. This helps everything settle without going soft.
Tip 4: If storing, re-crisp in the oven rather than the microwave. Low heat for a few minutes does wonders.
By the way, if you love food travel and culture, you might enjoy my quick look at a city famous for this dessert: Nablus food guide. It adds context and makes your homemade pan feel like a tiny trip.
What pan to bake Knafeh in
The pan matters more than people think. A heavy, light-colored metal pan promotes even browning and helps you get that crisp top without burning the edges. Nonstick can work, but keep an eye on temperature so the bottom doesn’t go too dark before the center is ready. Round pans look classic, though rectangular is easier for slicing into neat squares.
Handy pan pointers
- Size: a 9 to 10 inch round or 8 by 8 inch square works for small gatherings.
- Material: anodized aluminum or stainless steel for even heat. Cast iron can work if you go low and slow.
- Prep: butter the pan well. For extra protection, line the bottom with a thin parchment round if using semolina.
- Presentation: bake in a pan you can serve from. Less hassle and fewer dishes.
One more thing. If your kitchen tends to run hot, lower the oven rack slightly. This prevents the top from coloring too fast. You want steady browning, not sudden dark spots. And yes, a pizza pan or pie tin can absolutely do the job when you’re craving knafeh and don’t want to run to the store.
Common Questions
Can I make it without specialty cheese?
Yes. Use low-moisture mozzarella with a few spoonfuls of ricotta or cream. If your mozzarella tastes salty, rinse or soak briefly, then pat dry.
How sweet should the syrup be?
Sweet, but not sticky. Aim for a light syrup that clings to the pastry. Start with less, taste, and add more as needed.
What if the top isn’t crisp?
It usually means either too much syrup or the syrup was hot when you poured it. Remember the rule: cool syrup on hot pastry. Also make sure your pastry was properly buttered.
Can I prep it in advance?
Yes. Assemble and chill, then bake before serving. You can also bake, cool, and re-crisp in the oven, then syrup right before serving for a fresh feel.
How do I keep leftovers tasty?
Reheat in the oven at low heat for a few minutes. Avoid the microwave if you want to keep the crunch.
A sweet note to send you off
So that’s my friendly playbook. A little history for heart, a few technique tweaks, and a simple method that brings the bakery vibe home. If you want a deeper dive into its background, the entry on Knafeh on Wikipedia is a great overview. For a detailed step by step take, I love this home baker’s perspective in Palestinian Knafeh by Bake With Zoha. And if you enjoy exploring traditional techniques, Arabic knafeh by Chef in Disguise is a thoughtful, trusted guide.
Most of all, have fun with it. Keep your syrup cool, your butter melted, and your expectations joyful. When you plate that first slice and hear the gentle crunch, you’ll know why people adore knafeh. If you try it, tell me how it went. I’m cheering you on from my tiny kitchen.
Knafeh
Ingredients
For the pastry
- 8 oz Shredded pastry or fine semolina Depending on the style you choose
- 1/2 cup Unsalted butter, melted
- 1 cup Mild cheese (low-moisture mozzarella and a few spoonfuls of ricotta) Combining mozzarella with ricotta adds richness.
For the syrup
- 1 cup Granulated sugar
- 1 cup Water
- 1 tbsp Lemon juice Freshly squeezed is best.
- 1 tsp Orange blossom water or rose water Optional but greatly enhances flavor.
For serving
- 1/4 cup Pistachios, finely chopped For sprinkling on top.
Instructions
Prepare the syrup
- Simmer sugar and water until it looks clear and slightly thickens.
- Turn off the heat, add lemon juice and orange blossom or rose water.
- Let it cool.
Prepare the pastry
- For the pastry version, toss the shredded pastry with melted butter until glossy.
- Press half into a buttered pan, layer cheese in the center, then top with remaining pastry.
- For the semolina version, mix semolina with melted butter, press half into the pan, add cheese, then the rest of the semolina.
Bake
- Bake at moderate temperature until deeply golden.
- Check fragrance and edges to know when it’s close.
Finish the dish
- Drizzle cooled syrup over the hot pan in small amounts.
- Sprinkle with pistachios and rest for a few minutes before slicing.