
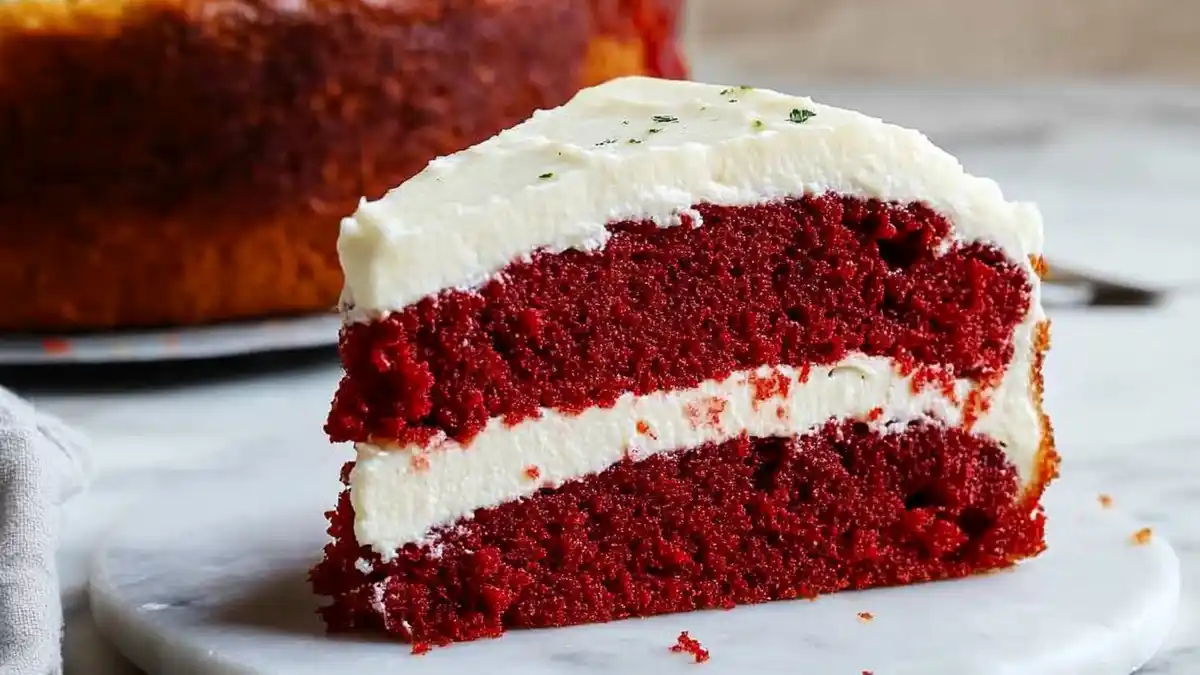
As the holiday season approaches, kitchens around the world are filled with the delightful aromas of baking. One dessert that has become a beloved staple during this time is none other than the Red Velvet Cake. With its striking red color and smooth, creamy frosting, this cake not only tastes divine but also brings a festive touch to any gathering. Whether served at Christmas parties or enjoyed during family celebrations, this classic dessert never fails to impress.
The rich history of red velvet cake dates back to the early 20th century, and its popularity has only grown. The combination of a moist texture and the subtle hint of cocoa makes it unique among other cakes. In this article, we’ll explore a foolproof recipe for Red Velvet Cake, along with tips, variations, and answers to common questions. Let’s get started on this delightful baking adventure!
- tions, making it a beloved choice for family gatherings.
- Customizable: Easily adapt this recipe to suit different tastes or dietary needs.
Key Ingredients and Substitutions
- White Sugar: Provides sweetness. You can swap in brown sugar to add a richer, more complex flavour.
- Shortening: Gives the cake a tender texture. You can use unsalted butter if preferred.
- Red Food Coloring: Essential for the signature red hue. Gel food colouring works best for vibrant results.
- Buttermilk adds moisture and tanginess. You can substitute regular milk mixed with a tablespoon of vinegar.
- Cocoa Powder: Adds a subtle chocolate flavour. Use Dutch-processed cocoa for a richer taste.
How to Make Red Velvet Cake (Step-by-Step)
Step 1: Preheat and Prepare
Start by preheating your oven to 350°F (175°C). Grease and flour two 9-inch round cake pans to ensure easy release after baking.

Step 2: Cream the Sugar and Shortening
Combine the white sugar and shortening in a large mixing bowl. Using an electric mixer, beat the mixture until it’s light and fluffy. This step is essential for incorporating air, which will help the cake rise beautifully.
Step 3: Add Eggs
Add eggs in one step at a mixing them thoroughly with each addition. This ensures even distribution throughout the batter.

Step 4: Create the Cocoa Paste
Mix the red food colouring with cocoa powder in a small bowl to form a paste. This combination contributes to the cake’s colour and enhances its flavour.
Step 5: Combine Wet Ingredients
Whisk together the buttermilk, salt, and vanilla extract in another bowl. This mixture will add moisture and flavour to the cake.
Step 6: Mix Dry Ingredients
Sift the all-purpose flour into a separate bowl. Add the flour mix in the creamed mix, and then alternate with the buttermilk mixture. Stir gently until just combined to prevent overworking the batter.
Step 7: Mix in Vinegar and Baking Soda
A small dish mix baking soda and vinegar in a small bowl. The mixture will fizz, creating a leavening effect. Gently fold this into the batter to add fluffiness.
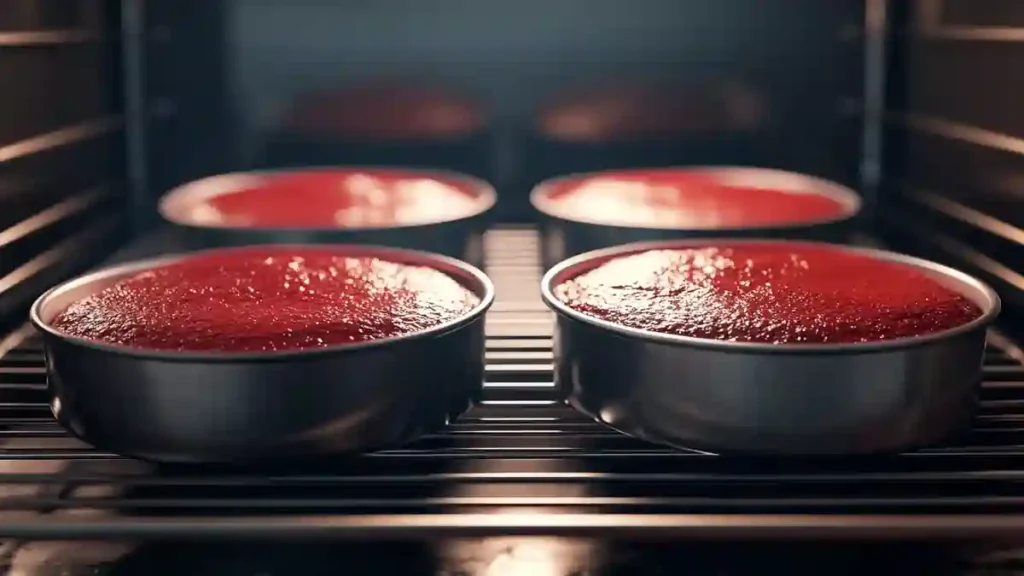
Step 8: Bake
Distribute the batter equally among the pans that have been prepared. Bake for 30-minutes or so until a sharp toothpick placed in the middle is clear. Let the cakes cool in the pans for a few minutes before moving them to a wire rack.
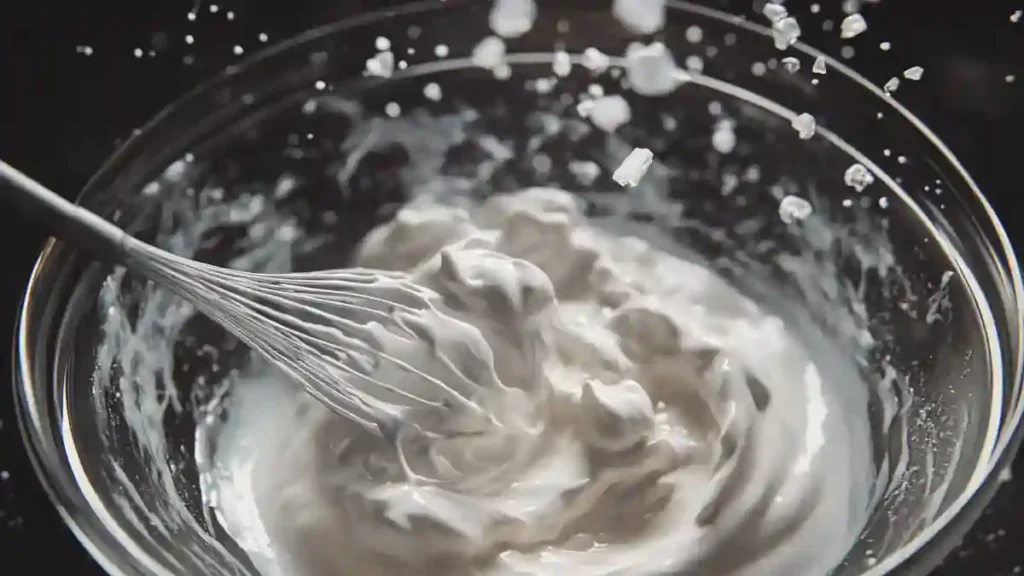
Step 9: Prepare the Icing
Heat the milk and flour in a saucepan over low heat to make the icing, stirring constantly until thick. Once cooled, the sugar, butter, and vanilla are melted until fluffy. Gradually add the cooled milk mixture until smooth.
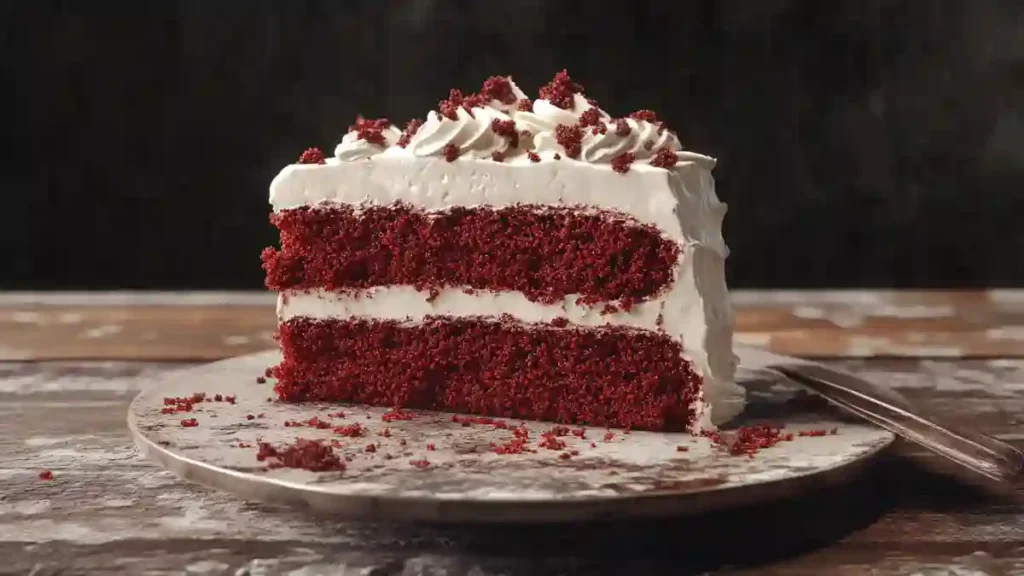
Step 10: Frost and Serve
Once the cakes are completely cool, frost each layer generously with creamy icing. Slice, serve, and enjoy the delightful flavours of your homemade red velvet cake!
Expert Tips for Success
- Room-Temperature Ingredients: For the best mixing results, ensure that your eggs, butter, and milk are at room temperature.
- Don’t Overmix: Mix until combined to keep the cake tender and fluffy.
- Check for Doneness: Ovens vary; check your cakes a few minutes before the suggested baking time.
- Cooling: Let the cakes cool completely prior to frosting, so as to ensure that the icing isn’t melting.
Variations and Customizations
- Chocolate Red Velvet: Increase the cocoa powder for a more pronounced chocolate flavour.
- Nutty Addition: Add chopped walnuts or pecans for a delightful crunch.
- Different Frosting: Try cream cheese frosting or a chocolate ganache for a unique twist.
- Mini Cakes: Bake in smaller cake pans for individual servings or cupcakes for a fun party treat.
Storage and Reheating Instructions
- Storing Leftovers: Any leftover cake can be kept in an airtight container at room temperature for up to three days or refrigerated for up to a week.
- Freezing: Wrap slices in plastic wrap and place them in a freezer-safe bag. You can keep them on the counter for upto two months.
- Reheating: For a warm treat, microwave a slice for 10-15 seconds.
Serving Suggestions
Pair your red velvet cake with:
- A scoop of vanilla ice cream for a delightful contrast.
- Fresh berries for a burst of flavour.
- A dollop of whipped cream for added creaminess.
Frequently Asked Questions (FAQs)
What is the story behind Red Velvet cake?
Red Velvet cake has a fascinating history dating back to the early 1900s. It was originally known for its smooth, velvety texture, which was achieved by using natural cocoa powder that reacted with acidic ingredients like buttermilk and vinegar. This reaction enhanced the cake’s deep red color even before food coloring became a standard ingredient. Over time, red velvet cake ice cream, red velvet cookies with cake mix, and red velvet cinnamon rolls have emerged as delicious variations of this iconic dessert.
How does Red Velvet cake get its red color?
Traditionally, Red Velvet cake got its red hue from the natural reaction between cocoa powder, vinegar, and buttermilk. However, modern recipes often use red food coloring to intensify the color. Some bakers prefer natural alternatives like beet juice or pomegranate powder for a more organic option. Whether you’re making a gluten free red velvet cake or classic red velvet brownies, the red color remains an essential characteristic of this beloved dessert.
Is Red Velvet just chocolate cake with food coloring?
While Red Velvet cake contains cocoa powder, it is not the same as a classic chocolate cake. The difference lies in the unique combination of ingredients—buttermilk, vinegar, and a small amount of cocoa—that gives Red Velvet cake its tangy yet subtly chocolatey flavor. The texture is also softer and more delicate, making it perfect for creative variations like red velvet oreos or red velvet cake ice cream.
Are there gluten-free versions of Red Velvet cake?
Yes! A gluten free Red Velvet cake can be made by substituting all-purpose flour with gluten-free flour blends. It’s essential to use a mix that contains xanthan gum or another binding agent to maintain the soft, velvety texture. Many gluten-free bakers also experiment with almond flour or oat flour to add more depth to the flavor while keeping the cake light and moist.
What are some popular Red Velvet dessert variations?
Beyond the classic cake, Red Velvet has inspired many creative desserts. Some of the most popular include red velvet brownies, which combine the richness of brownies with the signature tangy sweetness of Red Velvet. Another favorite is red velvet cinnamon rolls, which feature the same deep red dough swirled with cinnamon and topped with cream cheese frosting. For those who love frozen treats, red velvet cake ice cream is a delicious way to enjoy this classic flavor in a creamy, cold dessert.
What makes Red Velvet cookies different from regular cookies?
Red Velvet cookies with cake mix have a softer, more cake-like texture compared to regular cookies. This is because the mix contains cake flour, buttermilk, and a touch of cocoa, which makes the cookies chewy yet tender. Adding ingredients like white chocolate chips or cream cheese filling can enhance the richness, making them a favorite for Red Velvet lovers.
Red Velvet Cake
Ingredients
For the Cake:
- 1 ½ cups white sugar
- ½ cup shortening
- 2 eggs
- 4 tablespoons red food coloring
- 2 tablespoons cocoa powder
- 1 cup buttermilk
- 1 teaspoon salt
- 1 teaspoon vanilla extract
- 2 ½ cups sifted all-purpose flour
- 1 tablespoon distilled white vinegar
- 1 ½ teaspoons baking soda
For the Icing:
- 1 cup milk
- 5 tablespoons all-purpose flour
- 1 cup white sugar
- 1 cup butter room temperature
- 1 teaspoon vanilla extract
Instructions
- Preheat the oven to 350°F (175°C). Grease two 9-inch round cake pans.
- In a large bowl, beat together sugar and shortening until light and fluffy. Add eggs one at a time, mixing well after each.
- In a small bowl, combine red food coloring and cocoa powder to create a paste; add this to the creamed mixture.
- In another bowl, mix buttermilk, salt, and vanilla extract. Gradually add this mixture to the flour, alternating with the buttermilk mixture, until just combined.
- In a separate bowl, mix vinegar and baking soda; gently fold this into the cake batter.
- Pour the batter evenly into the prepared pans and bake for about 30 minutes, or until a toothpick inserted in the center comes out clean.
- Cool the cakes on a wire rack for 5 minutes, then invert onto a serving plate to cool completely.
- For the icing, heat milk and flour in a saucepan over low heat, stirring constantly until thick. Let it cool completely.
- Beat sugar, butter, and vanilla in a large bowl until light and fluffy. Gradually add the cooled flour mixture and beat until smooth.
- Frost the cooled cake layers and enjoy!
Notes
- For best results, ensure all ingredients are at room temperature before beginning.
Related Recipes
- Classic Chocolate Cake: A rich, moist chocolate cake perfect for any occasion.
- Carrot Cake: A deliciously moist cake with spices and cream cheese frosting.
- Lemon Drizzle Cake: A light and zesty cake that’s refreshing and perfect for spring.
Red Velvet Cake is more than just a dessert; it celebrates flavour, colour, and tradition. This recipe combines classic elements with creativity, making it an ideal choice for any holiday or special gathering. With its moist texture and creamy frosting, this cake will become a favourite in your household. So, gather your ingredients and get ready to impress your family and friends with this stunning red velvet cake. Happy baking!