
It all started one chilly December afternoon in my grandmother’s kitchen. She had a big ceramic bowl full of pretzels, melted chocolate warming on the stove, and trays covered in wax paper. My cousins and I gathered around, dipping, swirling, and decorating, turning plain pretzels into magical little treats. Ever since that day, chocolate covered pretzels have become a tradition in my family—one I now enjoy passing down to my own kids.
Whether you’re preparing a quick snack, planning edible gifts, or creating a sweet addition to your dessert table, this guide will walk you through every detail of making chocolate covered pretzels like a pro.
Introduction to Chocolate Covered Pretzels
The Irresistible Sweet-Salty Balance
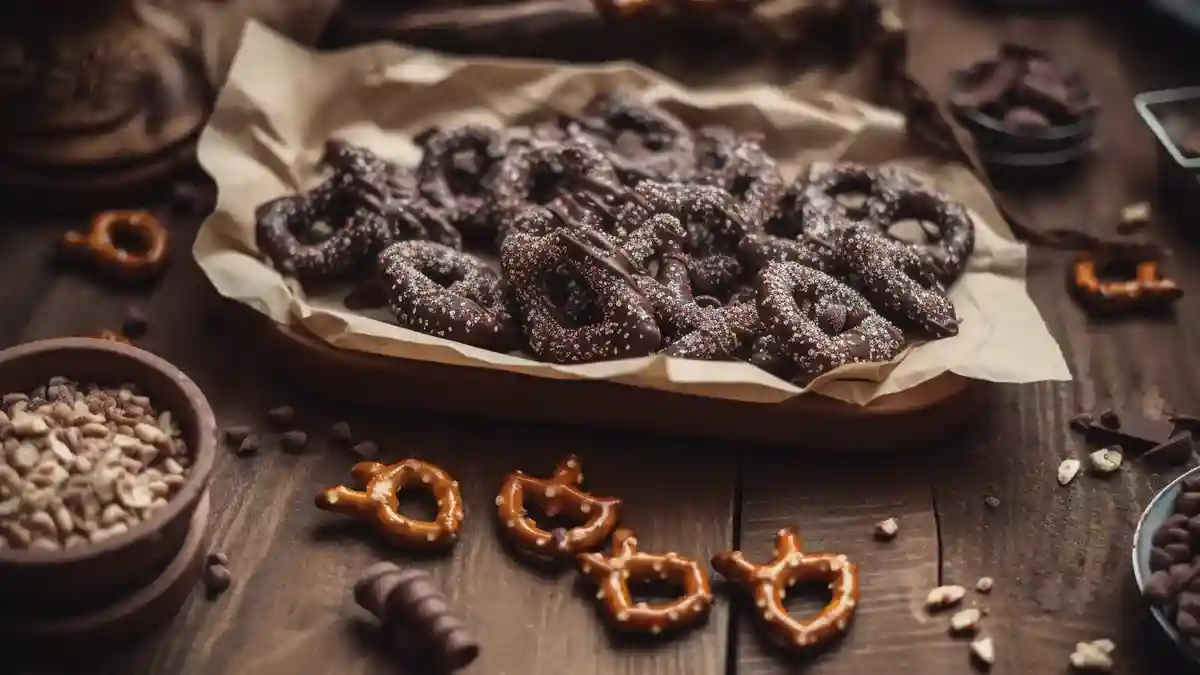
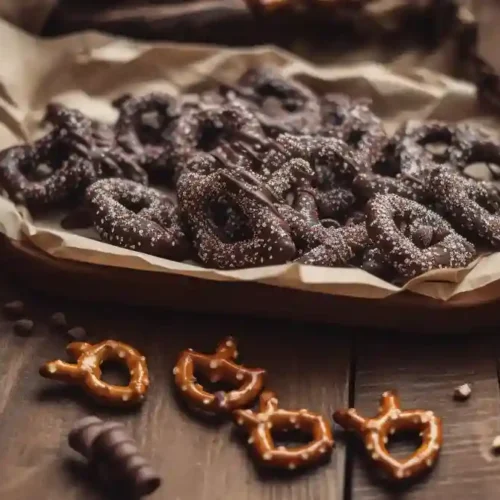
There’s something universally satisfying about biting into a crisp pretzel wrapped in smooth, rich chocolate. It hits all the notes: salty, sweet, crunchy, and creamy. Whether it’s for a snack or a celebration, it’s always a hit.
From Family Kitchens to Party Favors
I first fell in love with chocolate pretzels as a kid helping my aunt prepare treat bags for a school bake sale. We added colored sprinkles to match holidays, and the results were as beautiful as they were delicious.
Perfect for All Occasions
You can whip up a batch in under an hour. They’re easy, affordable, and endlessly customizable—ideal for birthdays, baby showers, or last-minute gifts.
Ingredients and Equipment You’ll Need
The Essentials
- Mini pretzels or pretzel rods
- Melting chocolate (milk, dark, white, or candy melts)
- Optional toppings: sprinkles, crushed nuts, coconut flakes, crushed candy canes
Choosing the Right Pretzel
Mini twists are great for bite-size snacking, while rods work best for dipping and gift presentation.
Best Chocolate for Dipping
Use high-quality chocolate or candy melts. Chocolate chips work but need extra shortening to melt smoothly. A double boiler or microwave will help melt it evenly without burning.
Tools That Help
- Parchment paper
- Forks or dipping tools
- Baking sheet
- Microwave-safe bowl or double boiler
How to Make Chocolate Coated Pretzels

Instructions about Chocolate Covered Pretzels
- Melt the chocolate
Use a double boiler or microwave in 30-second intervals, stirring each time until smooth. - Dip the pretzels
Use a fork or dipping tool to submerge and coat the pretzel. Tap off excess chocolate. - Add toppings
Before the chocolate hardens, sprinkle on your toppings of choice. - Let them set
Place on parchment-lined baking sheet and refrigerate for 20–30 minutes until hardened.
Tips for Perfection
- Don’t overheat the chocolate; low and slow is key.
- Use clean, dry pretzels to prevent chocolate from seizing.
- Work in small batches to avoid chocolate hardening too soon.
Customize Your Batch
Use different chocolates for swirls or drizzle. Add colored sprinkles or drizzle with peanut butter or caramel for gourmet flair.
Troubleshooting and Pro Tips
Why Are My Chocolate Covered Pretzels Not Hardening?
This could be due to humidity or improper chocolate tempering. Try refrigerating them on a lined tray for 30 minutes. If using chocolate chips, add a bit of coconut oil to smooth the consistency.
Avoiding Common Mistakes
- Moisture on pretzels: Causes chocolate to seize
- Overheating chocolate: Leads to grainy texture
- Not setting properly: Always allow enough chilling time
Bonus Hack
Use a fork to lift pretzels from the bowl and tap it on the edge. This removes excess chocolate and gives a cleaner finish.
Storage, Shelf Life & Gifting Tips
How Long in Advance Can I Make Chocolate Covered Pretzels?
You can prepare them up to 2 weeks in advance if stored properly in an airtight container in a cool place. Avoid the fridge for long-term storage to prevent condensation.
Keeping Them Fresh
Store layers with parchment paper in between. Keep them in a pantry or cabinet away from heat and moisture.
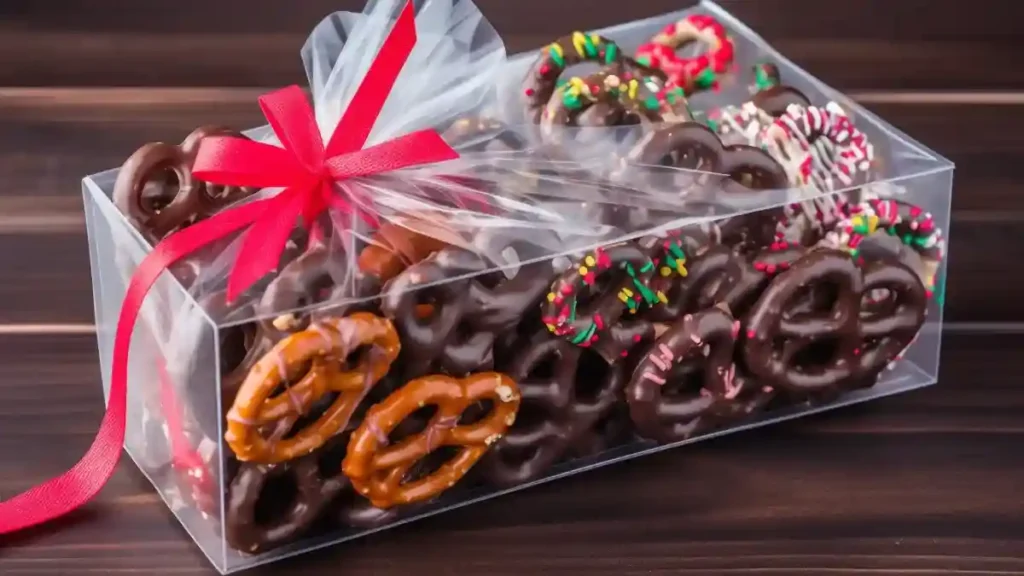
Great for Gifting
- Use treat bags tied with ribbon
- Label with flavors and “best by” date
- Perfect addition to cookie boxes or festive tins
Nutritional Value and Health Considerations
Are Chocolate Covered Pretzels Good for You?
While they are not a health food, they can be part of a balanced snack if eaten in moderation. Homemade versions allow you to control sugar and salt content.
Healthier Tweaks
- Use dark chocolate for antioxidants
- Choose whole grain pretzels for added fiber
- Avoid heavy toppings if you’re cutting calories
Smart Snacking
Stick to small servings—around 4–5 pieces. Pair with fruit or nuts to balance out the indulgence.
Fun Variations and Flavor Combos
Sweet Variations
- White chocolate + rainbow sprinkles = Birthday party magic
- Dark chocolate + sea salt = Sophisticated snacking
- Milk chocolate + crushed peppermint = Holiday vibes
Nutty & Crunchy
- Add crushed almonds, pistachios, or peanuts
- Try toffee bits or graham cracker crumbs for added texture
Flavor Infusions
- Mix espresso powder or cinnamon into the melted chocolate
- Add a touch of chili or cayenne for a spicy kick
Serving Ideas and Occasions
Events and Gatherings
Serve in decorative jars or bowls at parties. They pair well with coffee or wine and make excellent snack board additions.
Seasonal Themes
- Christmas: Red and green sprinkles
- Halloween: Orange drizzle and candy eyes
- Valentine’s Day: Heart-shaped sprinkles with pink chocolate
You can even dip pretzels halfway for a more elegant look.
People Also Ask (FAQs)
How to make chocolate coated pretzels?
Melt chocolate, dip the pretzels, add toppings, and let them set on parchment paper.
How long in advance can I make chocolate covered pretzels?
Up to 2 weeks if stored in an airtight container at room temperature.
Is chocolate covered pretzels a healthy snack?
No, they’re a sweet treat. Use dark chocolate for a slightly better option.
What is the best way to dip pretzel rods in chocolate?
Use a tall glass, dip ¾ of the rod, shake off excess, and let it set flat.
Amazing Vegetable Pizza
Equipment
- Pizza Stone
Ingredients
Pizza Dough
- 1 cup water lukewarm
- 2 cups all-purpose flour
- 1 tsp instant yeast
- 1 tsp salt
- 1 tsp sugar
Pizza Toppings
- red sauce
- 1/4 red onion
- 1/4 green pepper
- 1/4 red pepper
- rosemary
Instructions
- Combine the water, yeast and sugar in a bowl. Rest for 5 minutes.
- Combine the flour and salt.
- Add the yeast mixture and knead until you get a soft ball.
- Place in a bowl and cover. Let rise for 30 minutes.
- Divide the dough and form pizzas.
- Top the pizzas with sauce and vegetables, cook for 15 minutes on the pizza stone.