

Introduction to Homemade Dinner Rolls
The Allure of Homemade Dinner Rolls
I still remember the warm scent of freshly baked bread wafting through my grandmother’s kitchen on Sunday afternoons. Her hands, dusted with flour, would gently shape each roll, humming softly as she worked. It was not just bread—it was love in edible form. That memory inspired my own pursuit of perfect homemade dinner rolls, especially when served alongside my Creamy Mushroom Soup—a comforting duo for any occasion.
Why Choose Homemade Over Store-Bought?
Baking homemade dinner rolls allows me to control the ingredients, eliminate preservatives, and ensure freshness. Store-bought options, while convenient, often lack the softness, aroma, and personalized touch that come from rolls made by hand. More than a recipe, homemade baking becomes a tradition, a connection to loved ones, and a delight shared with others.
Essential Ingredients for Perfect Dinner Rolls
Flour: The Foundation of Your Rolls
Flour serves as the backbone of any bread recipe. For light and fluffy rolls, I use all-purpose flour due to its balanced protein content, which creates a soft yet structured crumb. For those seeking a denser bite, bread flour is a viable alternative bread flour is a viable alternative. You can also try it in my 7-Step Sourdough Bread Recipe to experience its full effect.
Yeast: Activating the Rise
Yeast is a living organism, and its health is crucial for well-risen bread. I prefer active dry yeast and always proof it in warm milk to ensure it is alive and active. The ideal temperature is between 100°F to 110°F. Too cold and the yeast stays dormant; too hot and it dies.
Liquids: Milk and Water Roles
Milk provides richness and a tender texture to rolls. Water, when used in moderation, assists in hydrating the dough. I warm the milk slightly before mixing it with yeast to activate the fermentation process. Using whole milk yields the softest texture.
Sweeteners and Fats: Enhancing Flavor and Texture
Sugar acts not only as a flavor enhancer but also feeds the yeast. Butter contributes richness and softness. I use melted unsalted butter to maintain full control over the salt levels in the recipe.
Salt: Balancing the Flavors
Salt is essential to balance the sweetness and strengthen the dough’s gluten structure. I always add salt after the yeast is activated, as direct contact with salt can inhibit yeast activity.
Step-by-Step Guide to Making Homemade Dinner Rolls
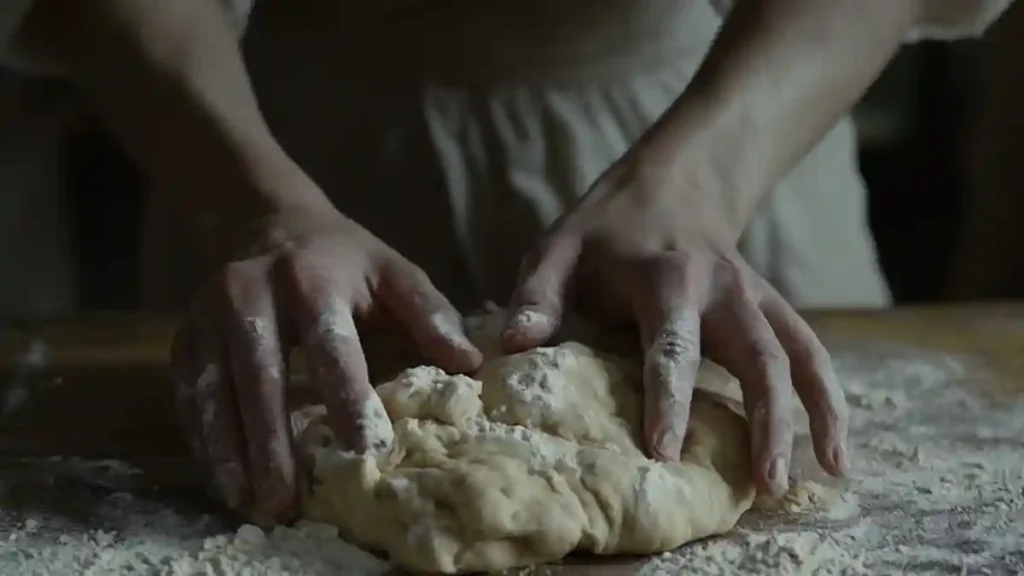
Preparing the Dough: Mixing and Kneading Techniques
To prepare the dough, I combine warm milk, sugar, and yeast, allowing it to foam before mixing in the remaining ingredients. Using a stand mixer with a dough hook, I slowly add flour until a sticky, cohesive dough forms. Kneading by hand for 10 minutes also develops gluten and builds structure.
First Rise: Tips for Optimal Proofing
Once the dough is kneaded, I shape it into a ball and place it in an oiled bowl. I cover it with plastic wrap and let it rise in a warm, draft-free space. In my experience, the inside of an off oven with the light on offers the ideal environment. The dough should double in size, which typically takes 1 to 2 hours.
Shaping the Rolls: Methods for Uniformity
After the initial rise, I divide the dough into 15 equal pieces. Rolling each piece under my cupped hand on a floured surface ensures round, uniform rolls. Consistent shaping ensures even baking and a pleasing visual presentation.
Second Rise: Ensuring Light and Fluffy Rolls
I arrange the dough balls in a greased baking dish, spacing them slightly apart. Covered with plastic wrap, I allow them to rise again until puffy. This second proofing is crucial for achieving the signature fluffiness associated with soft dinner rolls.
Baking: Achieving the Perfect Golden Crust
I preheat the oven to 350°F and place the rolls on a low rack. After 20 to 25 minutes of baking and a mid-bake rotation, I brush them with melted butter. This adds both flavor and a golden shine.
Common Mistakes and Troubleshooting in Dinner Roll Baking
Dough That Doesn’t Rise: Causes and Solutions
If the dough does not rise, I first check the yeast’s expiration date. Dead yeast will not activate. Additionally, I verify that the liquid used was neither too cold nor too hot. Patience is vital—proofing time may vary based on ambient temperature.
Dense or Tough Rolls: Avoiding Over-Kneading and Over-Flouring
Dense rolls often result from over-kneading or too much flour. I always spoon and level flour instead of scooping. A dough that is too dry will not rise properly and will bake into dense rolls. I add flour gradually until just incorporated.
Pale or Burnt Rolls: Baking Temperature and Time Tips
Baking at too low a temperature results in pale, undercooked rolls, while high temperatures may burn the tops before the centers cook. I use an oven thermometer to ensure accuracy and rotate the pan midway through baking for even coloring.
Make-Ahead and Storage Tips for Homemade Dinner Rolls
Preparing Rolls in Advance: Refrigeration and Freezing Techniques
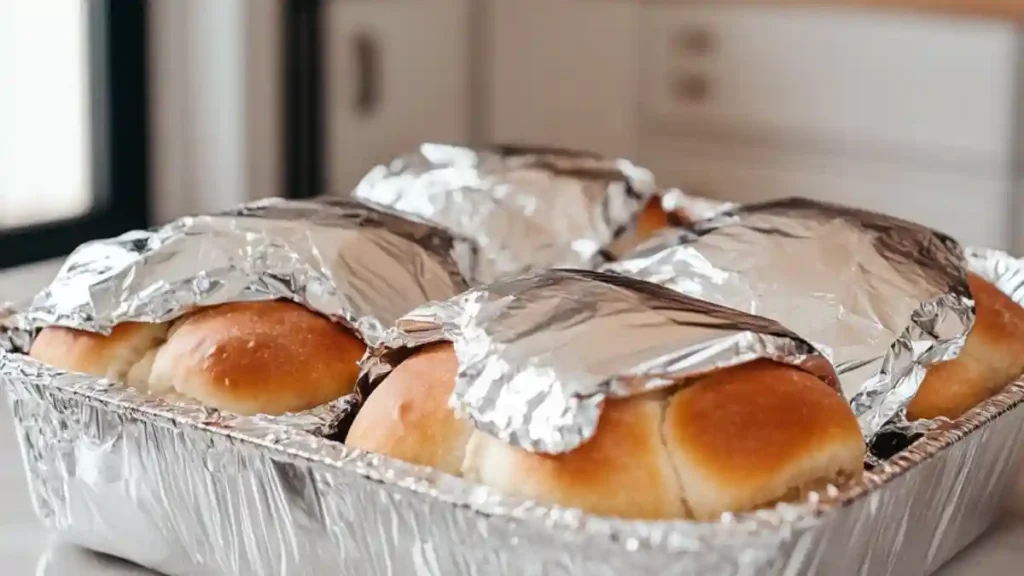
To make ahead, I shape the rolls and place them in a baking dish, covering them tightly before refrigerating overnight. The next day, I let them sit at room temperature for an hour before baking. Alternatively, baked rolls freeze well. I often prep a double batch to pair with my Chicken Minis Breakfast Sandwich during the week.
Storing Baked Rolls: Maintaining Freshness and Softness
To keep rolls fresh, I store them in an airtight container at room temperature for up to three days. Reheating in a low oven for 10 minutes restores softness. For longer storage, freezing is preferred over refrigeration, which can dry out the bread.
And don’t forget dessert—try my Classic Tiramisu Recipe for an elegant finish to a homemade dinner.
Do homemade dinner rolls need to be refrigerated?
No, homemade dinner rolls do not require refrigeration if you plan to eat them within 2–3 days. Store them in an airtight container at room temperature to preserve freshness. However, if you need to keep them longer, freezing is a better option. Many people choose to freeze homemade dinner rolls instead of refrigerating them, as cold storage tends to dry out the texture.
How to make dinner rolls step by step?
To follow a classic dinner rolls recipe, start by preparing the yeast and warm milk mixture. Add sugar, melted butter, salt, and flour. Knead the dough until smooth, let it rise, shape it into rolls, and let them rise again before baking. This basic bread recipe results in soft, golden rolls. Brush with butter after baking for the perfect finish.
Can you make rolls the night before?
Yes, you can prepare the rolls a day in advance. After shaping the dough into balls, place them in a baking dish, cover tightly, and refrigerate overnight. The next day, allow them to come to room temperature and rise for about an hour before baking. This technique is especially helpful for Thanksgiving rolls or special occasions.
Why are my dinner rolls not light and fluffy?
If your rolls turn out dense, the dough may have been under-proofed or over-floured. Accurate measuring and proper kneading help ensure a soft texture. Avoid rushing the rise time. A good soft bun recipe relies on patience and warm conditions to allow the yeast to work effectively.
How long can rolls sit at room temperature?
Freshly baked rolls can sit at room temperature for up to three days if stored in a sealed container. After that, they may begin to dry out or lose their softness. For longer storage, opt to freeze homemade dinner rolls, which helps retain flavor and texture without spoilage.
How do you store homemade rolls after baking?
Let the rolls cool completely before storing. Place them in an airtight container or wrap tightly in foil. You can keep them at room temperature for up to three days. For extended storage, freeze the rolls using freezer-safe bags. This method is popular with both potato rolls recipes and cinnamon rolls recipes, as it maintains freshness over time.

Homemade Dinner Rolls
Equipment
- Mixing bowl
- Stand Mixer (optional)
- Baking Dish
Ingredients
Dinner Roll Dough
- 1 cup warm whole milk 100°F to 110°F
- 2 1/4 tsp active dry yeast
- 1/4 cup sugar
- 1/4 cup unsalted butter melted
- 1 tsp salt
- 3 cups all-purpose flour
Finishing
- 2 tbsp melted butter for brushing after baking
Instructions
- In a bowl, mix warm milk, sugar, and yeast. Let it sit for 5–10 minutes until frothy.
- Add melted butter and salt. Gradually mix in flour until a sticky dough forms.
- Knead the dough for 10 minutes by hand or with a mixer until smooth and elastic.
- Place dough in a greased bowl, cover, and let rise in a warm place until doubled, about 1–2 hours.
- Divide dough into 15 equal pieces, shape into balls, and place in a greased baking dish.
- Cover and let rise again for about 1 hour, until puffy.
- Bake in a preheated 350°F (175°C) oven for 20–25 minutes until golden brown.
- Brush the hot rolls with melted butter and let cool slightly before serving.